Email forwarder in a nutshell is basically a redirection setup from one email address to another email address. In this article let’s find out how to setup an email forwarder in both cPanel and Webmail.
It’s important to use email forwarding responsibly and consider the security implications, especially when forwarding sensitive information. Always configure and manage forwarding settings securely to protect your email communications.
Table of Contents
What are Email Forwarders?
Email forwarders are features or settings that allow you to automatically redirect emails sent to one email address to another specified email address. They are commonly used for various purposes, providing flexibility and convenience in managing email communication.
Here are some key points about email forwarders:
- Redirection: An email forwarder simply forwards incoming emails from one email address (the source) to another email address (the destination). This redirection happens automatically without requiring manual intervention for each incoming email.
- Consolidation: Email forwarders are often used to consolidate multiple email accounts. For example, you might have separate email addresses for work, personal use, and specific projects. With email forwarding, you can redirect all emails to a central mailbox, making it easier to manage and monitor your messages.
- Aliases: Forwarders can be used to create email aliases. An alias is an additional email address that redirects messages to your primary inbox. This can be useful for creating unique addresses for different purposes (e.g., support@yourdomain.com, sales@yourdomain.com), while still receiving all messages in one place.
- Temporary Forwarding: Email forwarders can be set up temporarily for specific purposes. For instance, if you’re going on vacation or leaving a position, you might temporarily forward emails to a colleague or a different account.
- Team Collaboration: In a business or team setting, email forwarders can be configured to ensure that emails sent to a particular address are accessible to multiple team members. This is helpful for managing shared inboxes or collaborative projects.
- Filtering and Sorting: Some email providers allow you to set up rules or filters along with forwarding. This means you can specify certain conditions (e.g., emails from a specific sender or with a particular subject) to determine which emails get forwarded and which don’t.
- Configuration: The process of setting up email forwarders depends on your email provider. Typically, you can configure these settings in the email account’s settings or preferences.
It’s important to note that while email forwarders offer convenience, they should be used with caution, especially when dealing with sensitive information. Ensure that the forwarding settings are secure and follow best practices to protect your email communications.
Creating a Forwarder in cPanel
Creating an email forwarder in cPanel is a straightforward process. cPanel is a popular web hosting control panel that provides tools for managing various aspects of your hosting account, including email. Here are the steps to create an email forwarder in cPanel:
- Log in to cPanel:
- Open your web browser and go to the cPanel login page. This is usually accessed through a URL provided by your hosting provider (e.g., https://yourdomain.com/cpanel).
- Enter your cPanel username and password to log in.
- Navigate to Email Forwarders:
- Once logged in, look for the “Email” or “Mail” section in cPanel.
- Find and click on the “Forwarders” or “Forwarder” option. The exact wording may vary depending on your cPanel version.
- Add a Forwarder:
- In the Forwarders section, you should see an option to “Add Forwarder” or “Create a Forwarder.” Click on it.
- Set Up Forwarder Details:
- On the Add a New Forwarder page, you’ll need to configure the forwarder details.
- Enter the email address from which you want to forward emails in the “Address to Forward” or “Email” field.
- In the “Forward to Email Address” field, enter the destination email address where you want to receive forwarded emails.
- Advanced Options (Optional):
- Some cPanel versions provide advanced options or settings. You may have the option to set up filters or rules for forwarding, but these are often optional.
- Create Forwarder:
- Once you’ve entered the required information, click the “Add Forwarder” or “Create Forwarder” button.
- Confirmation:
- You should see a confirmation message indicating that the forwarder has been successfully created.
That’s it! You’ve now set up an email forwarder in cPanel. Any emails sent to the specified email address will be automatically forwarded to the destination email address you configured.
Keep in mind that the cPanel interface may vary slightly depending on the hosting provider and the version of cPanel they are using. If you encounter any difficulties or have specific questions about your cPanel version, you may want to refer to your hosting provider’s documentation or support resources.
Creating a Forwarder in Webmail
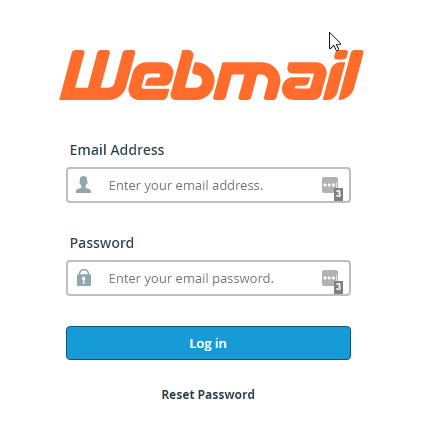
Step 1. Start by logging into webmail. Remember, you can log into webmail by visiting example.com/webmail. Also be sure to use the full email address as the username and the password associated with the email account you are logging into.
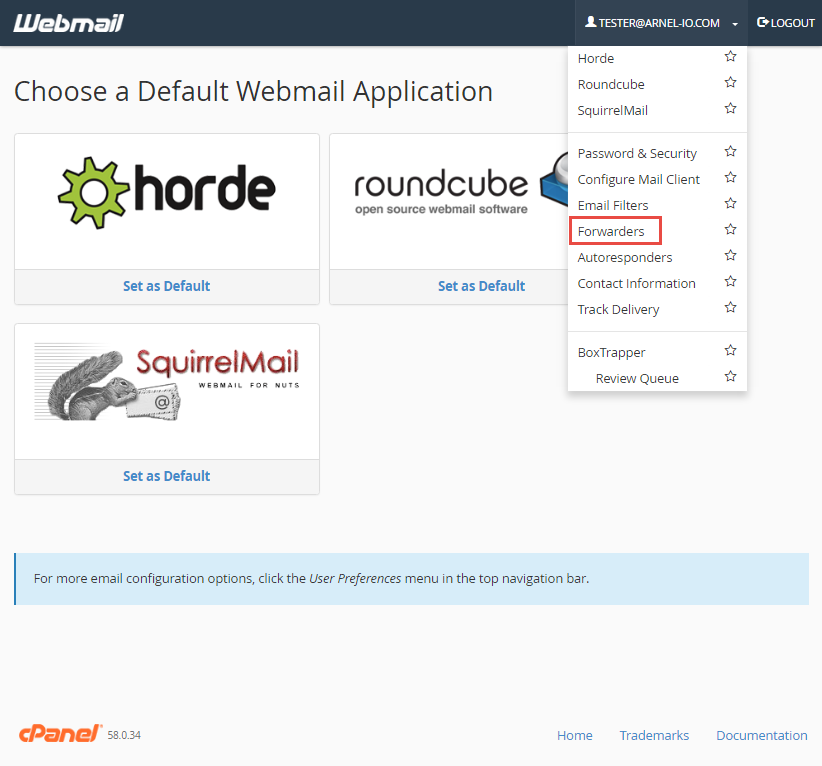
Step 2. Now, verify you are logged into the correct email address and click “Forwarders“.
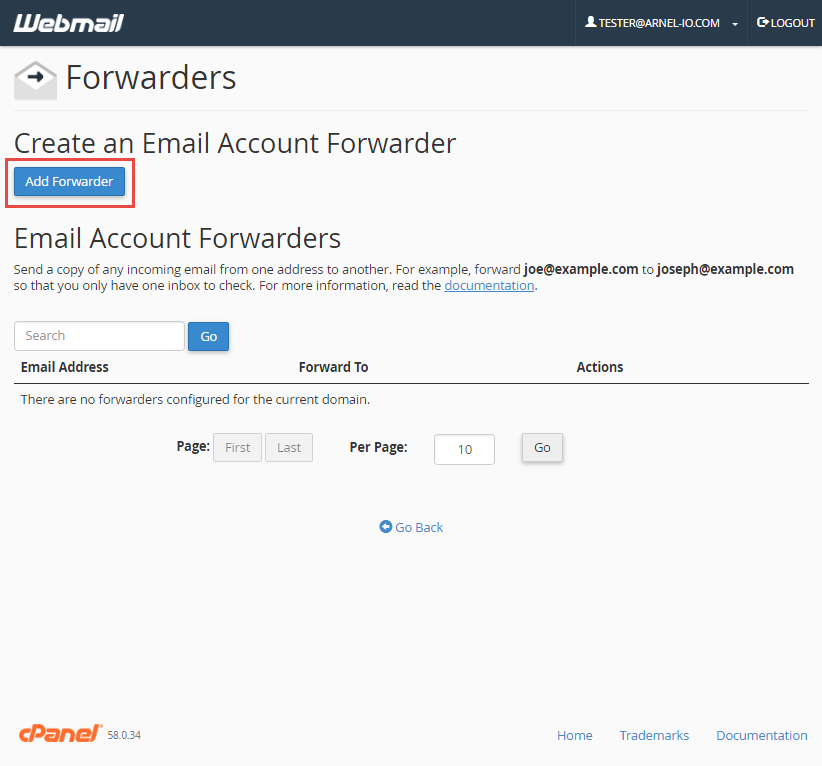
Step 3. This screen shows you currently have no forwarders set up. Click “Add Forwarder “.
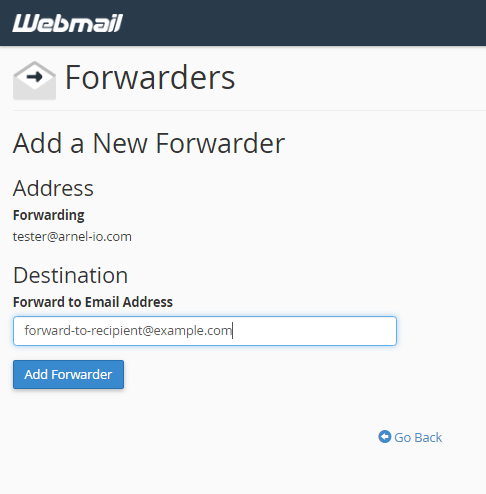
Step 4. Fill in the field with the address to forward to and click “add forwarder “.
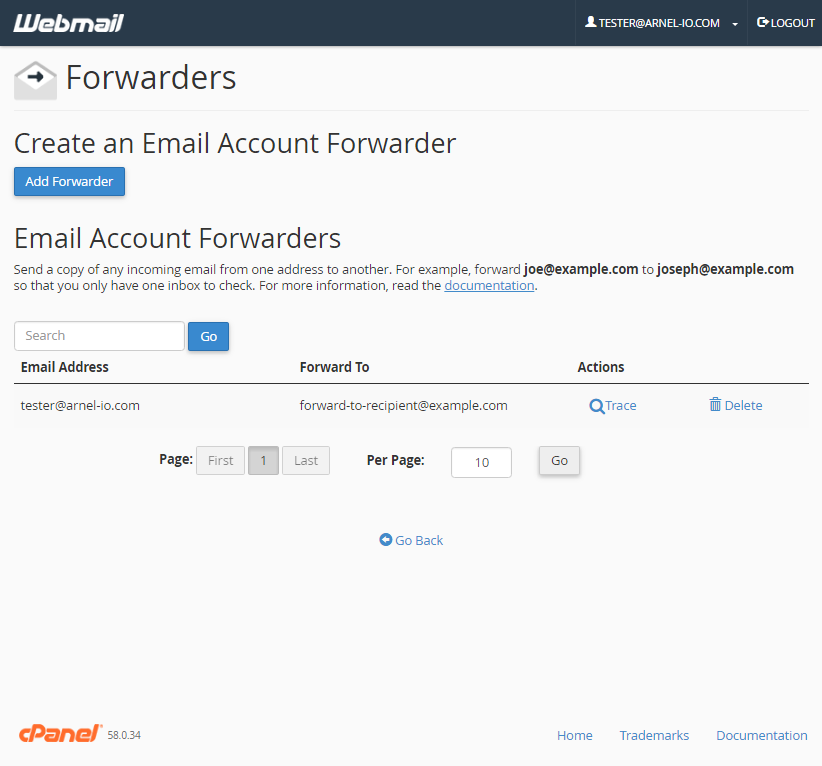
Step 5. Now, go back to “forwarding options” and verify that your forwarder is set up properly!
Please note that the exact steps can vary depending on your hosting provider, and some providers might use custom control panels instead of cPanel. If you’re unsure or if your hosting provider has a different control panel, it’s recommended to check their documentation or contact their support for specific instructions.
Additionally, setting up email forwarding at the domain level may have implications for all email accounts associated with that domain. Ensure that you understand the consequences and have the necessary permissions to make such changes.
Forward All Email for a Domain
- Log into the cPanel.
- Click Forwarders in the Mail section.
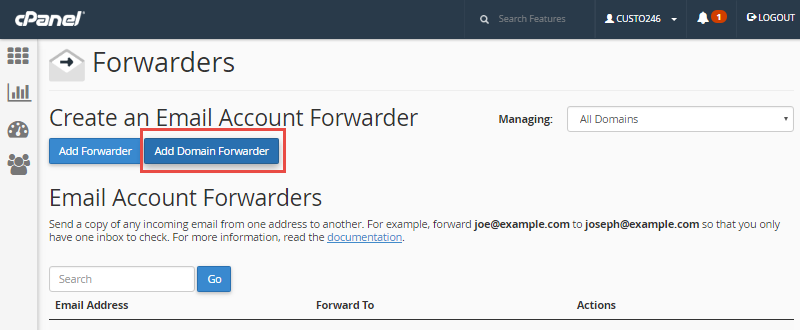
- Click Add Domain Forwarder.
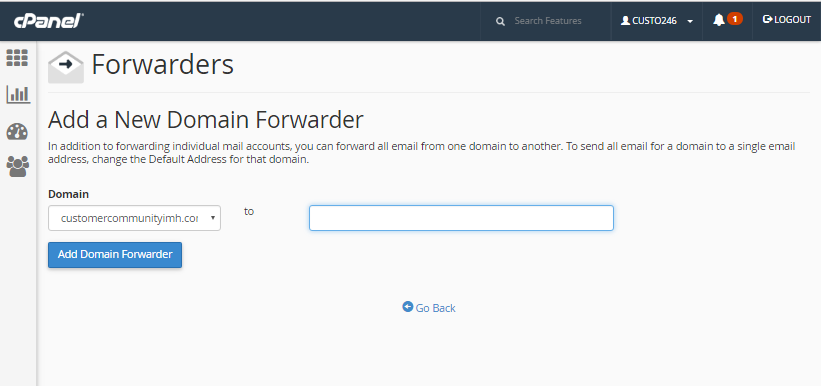
- Select the Domain you want to forward email from, in the drop-down box. Then, enter the domain you want to forward to. The official cPanel documentation notes: “Domain forwarding takes place only when a delivery is not successful. For example, a user sends an email to john@example1.com. If john@example1.com is an existing email address or auto responder, then the email will not be forwarded.”
- Click Add Domain Forwarder.
- You are finished when you see a message similar to: “File updated ‘/etc/vdomainaliases/example.com’ All email sent to example.com will now be copied to domain.com”.

Congratulations! You now know how to set up email forwarders in cPanel! Check out our Email section for more helpful tutorials.
