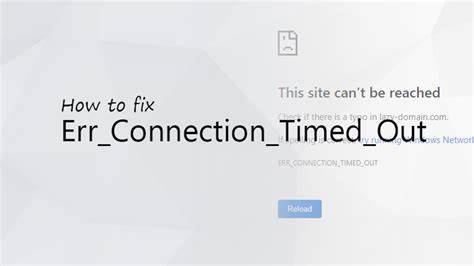
Are you seeing the “ERR_CONNECTION_TIMED_OUT” error in your browser? Not a very helpful error message, is it? If you are a daily WordPress user, then it’s always good to be aware of common errors like these that might prevent you from getting access to your website.
In today’s post, we’re going to take a deep dive into the “ERR_CONNECTION_TIMED_OUT” error and examine why you might see this and what you can do to fix it quickly.
Table of Contents
What is the ERR_CONNECTION_TIMED_OUT Error?
The ERR_CONNECTION_TIMED_OUT error is a common issue encountered when a website takes too long to respond to a request from your browser. This error indicates that the connection between your browser and the website’s server has timed out, meaning the server did not respond within a specified time limit. This can be caused by a variety of issues, including problems with your internet connection, server-side issues, or incorrect network settings.
Common Causes of ERR_CONNECTION_TIMED_OUT Error
- Network Issues: Poor or unstable internet connections can lead to this error.
- Server Problems: The website’s server might be down or experiencing heavy traffic.
- Firewall or Antivirus Software: Overly strict security settings can block access to websites.
- DNS Issues: Problems with the DNS server used to resolve website addresses can cause timeouts.
- Browser Cache: Corrupted or outdated cached data in your browser might interfere with loading the website.
- Proxy Settings: Incorrect or outdated proxy settings can prevent a connection.
- Blocked IP Address: The server might be blocking your IP address for various reasons.
How to Fix the ERR_CONNECTION_TIMED_OUT Error
Fixing the ERR_CONNECTION_TIMED_OUT error involves several steps. Here’s a step-by-step guide to help you address this error:

Step 1: Check Your Internet Connection
Ensure that your internet connection is stable and working correctly:
- Reconnect to Your Network: Disconnect and then reconnect to your Wi-Fi or Ethernet.
- Try a Different Network: If possible, connect to a different network to see if the error persists.
Step 2: Restart Your Router and Modem
- Turn Off Router and Modem: Power off your router and modem.
- Wait: Wait for about 30 seconds.
- Turn Them Back On: Power on the modem first, then the router.
Step 3: Clear Browser Cache
Cached data can sometimes cause issues. Clear your browser cache:
- Chrome:
- Open Settings.
- Go to Privacy and Security.
- Click on Clear browsing data.
- Select Cached images and files and click Clear data.
- Firefox:
- Open Options.
- Go to Privacy & Security.
- Under Cookies and Site Data, click Clear Data.
- Edge:
- Open Settings.
- Go to Privacy, Search, and Services.
- Under Clear browsing data, click Choose what to clear.
- Select Cached images and files and click Clear now.
Step 4: Disable Proxy Settings
Incorrect proxy settings can cause connection issues:
- Windows:
- Open Settings.
- Go to Network & Internet.
- Select Proxy.
- Ensure Use a proxy server is turned off.
- Mac:
- Open System Preferences.
- Go to Network.
- Select your network connection.
- Click Advanced, then Proxies, and ensure no proxies are selected.
Step 5: Disable Firewall and Antivirus Temporarily
Firewalls and antivirus software can sometimes block connections:
- Windows:
- Open Control Panel.
- Go to System and Security.
- Open Windows Defender Firewall.
- Click Turn Windows Defender Firewall on or off and disable it temporarily.
- Mac:
- Open System Preferences.
- Go to Security & Privacy.
- Open Firewall and click Turn Off Firewall.
Remember to re-enable your firewall and antivirus after testing.

Step 6: Flush DNS Cache
Flushing the DNS cache can resolve DNS-related issues:
- Windows:
- Open Command Prompt as Administrator.
- Type
ipconfig /flushdnsand press Enter.
- Mac:
- Open Terminal.
- Type
sudo killall -HUP mDNSResponderand press Enter.
Step 7: Change DNS Servers
Switch to reliable DNS servers such as Google DNS or OpenDNS:
- Google DNS: 8.8.8.8 and 8.8.4.4
- OpenDNS: 208.67.222.222 and 208.67.220.220
Windows:
- Open Control Panel.
- Go to Network and Sharing Center.
- Click Change adapter settings.
- Right-click your network connection and select Properties.
- Select Internet Protocol Version 4 (TCP/IPv4) and click Properties.
- Use the following DNS server addresses and input the DNS addresses above.
Mac:
- Open System Preferences.
- Go to Network.
- Select your network connection and click Advanced.
- Go to the DNS tab and add the DNS addresses above by clicking the “+” button.
Step 8: Reset TCP/IP Settings
Resetting TCP/IP settings can resolve network issues:
- Windows:
- Open Command Prompt as Administrator.
- Type
netsh int ip resetand press Enter.
- Mac:
- Open Terminal.
- Type
sudo ifconfig en0 downand press Enter. - Type
sudo ifconfig en0 upand press Enter.
Step 9: Update Network Drivers
Outdated or corrupt network drivers can cause connection issues:
- Windows:
- Open Device Manager.
- Expand Network adapters.
- Right-click your network adapter and select Update driver.
- Follow the prompts to update the driver.
- Mac: Ensure your macOS is up to date, which includes the latest drivers.
Step 10: Check for System and Browser Updates
Ensure your operating system and browser are up to date:
- Windows: Go to Settings > Update & Security > Windows Update.
- Mac: Open System Preferences > Software Update.
- Browser: Check for updates in your browser settings or about page.
Step 11: Contact Your ISP
If none of the above steps work, the issue might be with your Internet Service Provider. Contact them for assistance.
By following these steps, you should be able to diagnose and resolve the ERR_CONNECTION_TIMED_OUT error.
Conclusion
The ERR_CONNECTION_TIMED_OUT error is a common issue that prevents your browser from connecting to a website within the expected timeframe. It can stem from various sources, including network connectivity issues, server problems, DNS configurations, or browser settings. By systematically following the troubleshooting steps provided, you can identify and resolve the underlying cause of this error.


